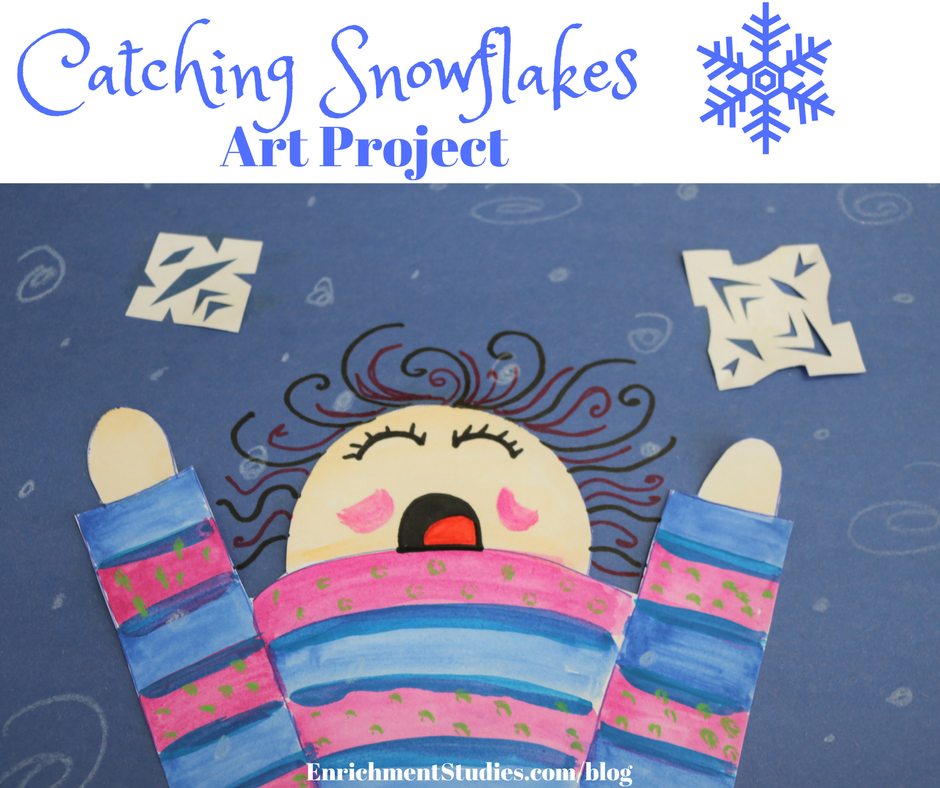
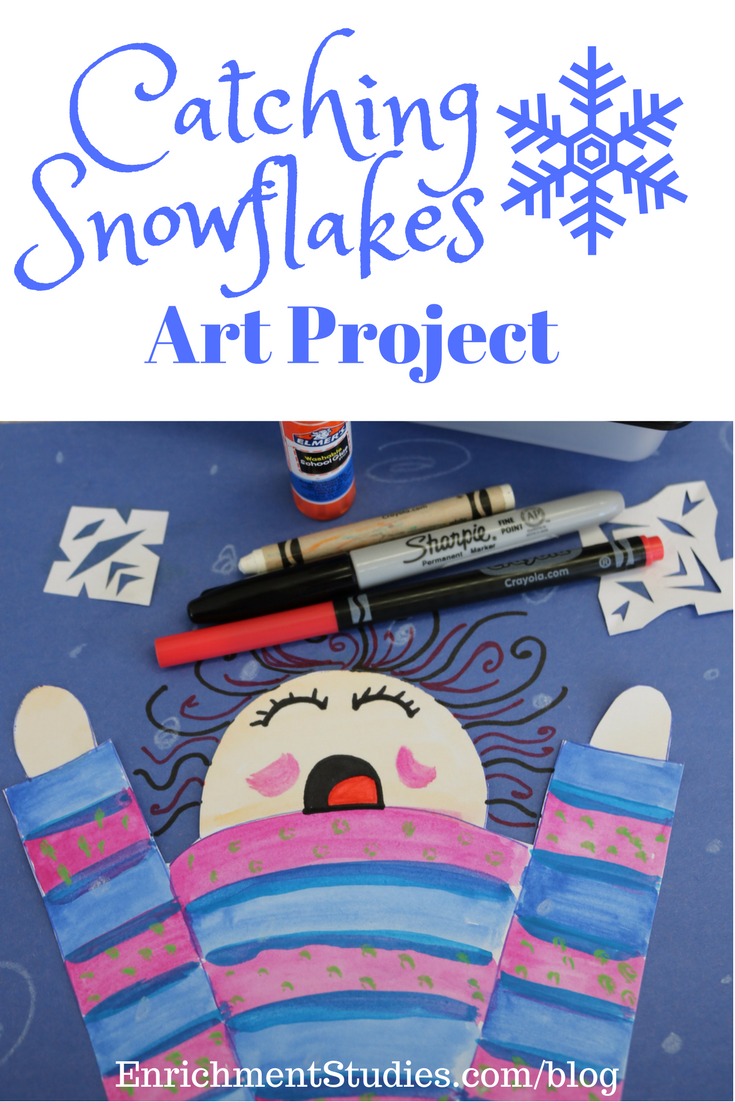
 Winter time is the perfect time to have your kids do some great artwork. The weather is nasty & you get all cooped up inside, so try this activity with them on one of those dreary days & see how it perks up everyone’s spirits! This is a mixed media piece that uses watercolor painting in addition to markers & the cutting of snowflakes, too.
What you will need: (affiliate links have been used)
- 1 piece thick white paper per child (the mixed media type of art paper is good, as it’s not as thick as watercolor paper so it handles the paint but also easier to cut out.)
- 1 piece colored card stock or construction paper for background per child
- Set watercolor paints, with brush, paper towel, and water cup (I absolutely LOVE this set from Crayola. The colors are vibrant and easy to work with!)
- Glue stick – 1 per child or they can share as well
- Pencil, white crayon, red marker & black thin marker – 1 of each per child
Directions:
1. The outline: First you need to decide whether to pre-outline the person’s shape on the white paper for them yourself, or let them do it. This depends on their age and skill level.
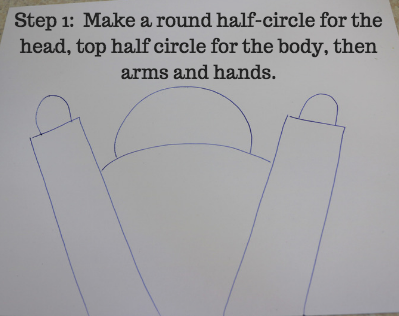
Basically, there needs to be a round half-circle for the head, then the top half circle for the body, and then add arms and hands. No details otherwise need to be there, as they are painting over this anyway. Do this with the pencil and try to keep it as light as possible.
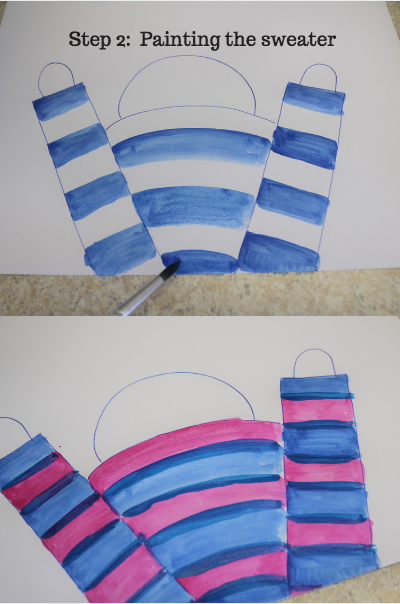
2. Painting the sweater: Start out by explaining how watercolor works and not to let it get too soggy wet, but they do have the freedom here to go outside the lines since they will be cutting this out, so you can tell them it’s ok to do that. I suggested bright colors for the sweater part and maybe even a pattern on the sweater to make the picture livelier.
In my example, I painted a blue stripe first, let it dry a minute, then went back and painted a pink one between all the blue, then I let that dry a couple minutes, and then added a darker blue thin stripe between the other colors.
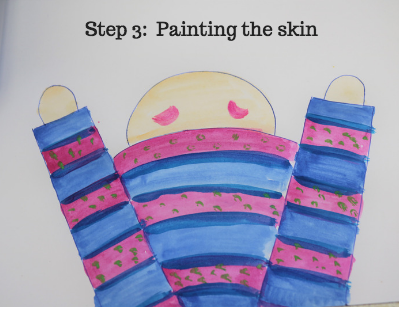
3. Painting the skin: Getting the skin tone right can be tricky. Depending on the skin color you want, starting with pink, orange, or brown and then diluting it with water will help. Practice on the side of the paper to get the color you want. (We will be cutting out our figure, so the sides will be thrown away, so it’s a good place to practice your colors)
Once you get the tone you want, paint in the skin color on the head and the hands and if they choose, also a little pink on the cheeks. The eyes and mouth will be drawn on in marker after it’s dry, so that they are thinner and more legible.
4. Cutting out snowflakes: Now, set that aside and let it dry while they do the next part, which is cutting out snowflakes for their sky. Show them how to do it, even if they’ve done it before. I found that older kids were confident in it, but then didn’t remember how to fold the paper and in result, no snowflake. Make sure the paper is small to start with, as it has to fit on the background, around the person they painted and at least 3 of them looks best. Just a couple of inches square for the paper is good. Fold it in half diagonally, into a triangle, and then again into another triangle before cutting the shapes into the edges.
5. Cutting out the figure and adding details: Once the sweater and skin is dry, the children can cut out their watercolor figure, and glue it on to the background paper, making sure to put the flat bottom edge lined up with the bottom edge of the colored paper.
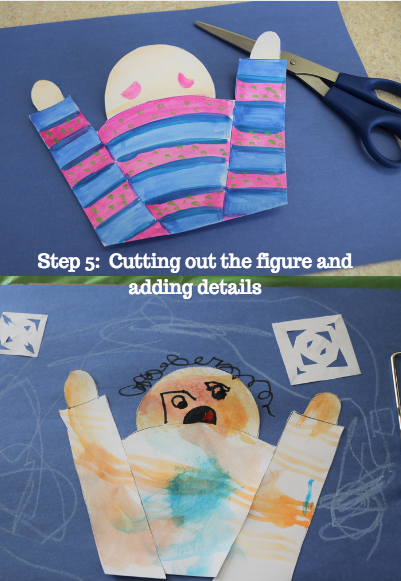
Using a marker, add facial features and hair. I prefer for the eyes to look closed so that it’s like they are in the snow, catching the snowflakes in their mouth, eyes closed. They can add eyelashes, and then draw an open mouth, with red tongue showing.
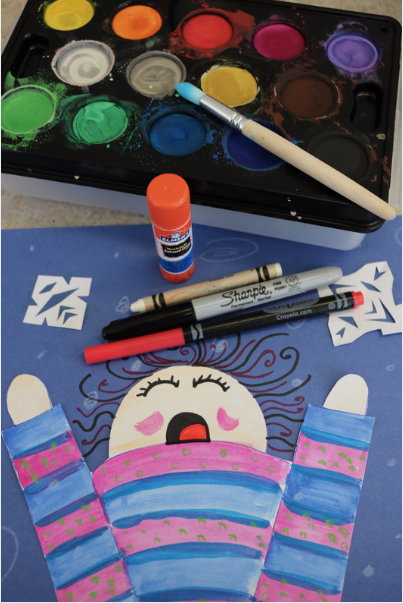
6. Snowflakes: Next, have them glue on the snowflakes where they choose. Then use the white crayon to draw falling snow. They can even put a few dots over the body too, to create some depth in the picture. I drew some solid dots and some little swirled circles as well for movement.
