by Erica Johns | Jul 28, 2016 | Art
Welcome to one of the projects in our series 8 Awesome Handprint Art Projects to do With Your Kids! To learn more about the project and see a complete list of methods, materials and projects, click here to start at the beginning. (new tab will open for you) Affiliate links are used in this post.

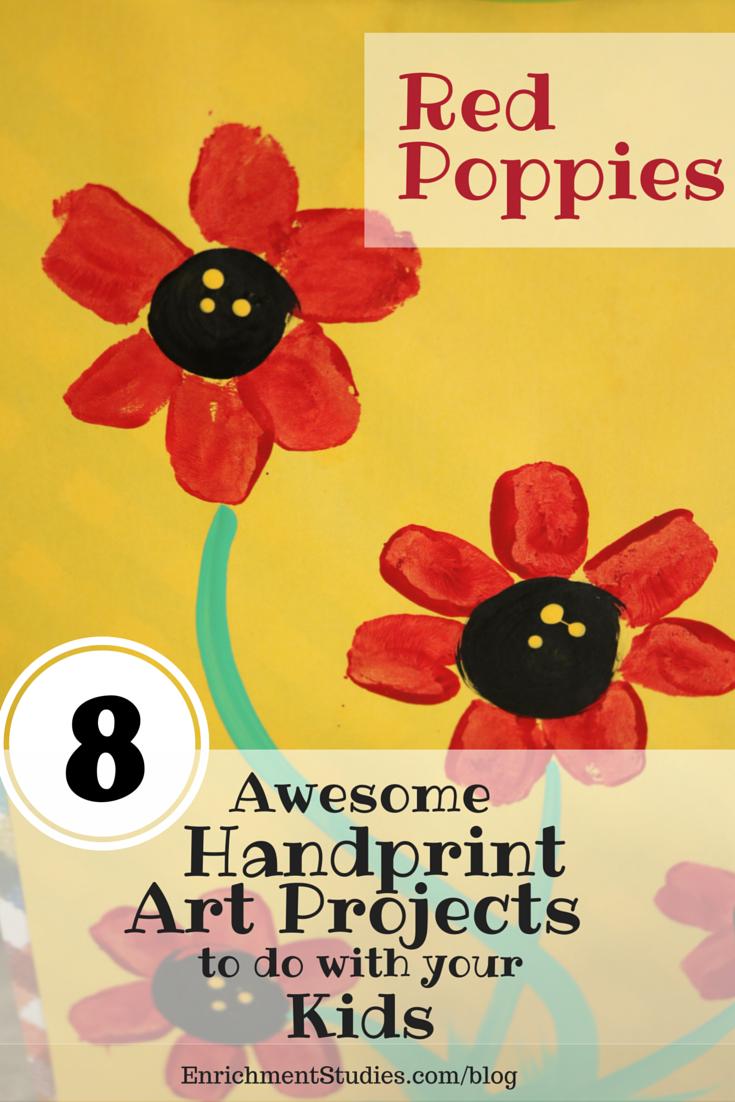
1. Red Poppies
Supplies you will need:
- Colored paper and paper with patterns if you choose to do the matted look and mount them for impact.
- Glue sticks for mounting artwork onto background paper
- Small paint brushes: I recommend this brand of brushes. They do not fall apart like cheaper brushes do, they hold up to frequent use and proper cleaning as well.
- Foam flat brushes
- Colored acrylic paints: This is the same set I have in my own home. You get a nice variety of colors at a good price. Plus, the box this set comes in is sturdy, so you can continue to use it for storage.
- Black sharpie or nice thin pens for detailing
You will need Yellow, black, green, and white paint. Yellow paper works great!
- Paint the leaves and stems in green.
- Make the flower petals using red paint and a fingertip. The thumb is ideal. Turn the paper as you go around to make it easier to reach and get the right angle.
- Once the paint dries a bit, paint a black circle in the center of each flower. Add yellow dot accents by dipping the handle of the paintbrush into the yellow paint and making the dots. Use white paint to make highlights on the leaves.
- Complete your artwork by mounting it onto a background page that peeks out around the edges to form a frame and give it a matted look. Use glue stick on the back of your artwork to affix it to the background page.
All posts in this series:
- Intro to the series
- Red Poppies
- Handprint Trees
- Handprint Fish
- Fingerprint Dandelion
- Handprint Kite
- Handprint Peacock
- Handprint Birds or Chickens
- Hand and fingerprint creative scene
This project has also been included in the 2016 Paint-a-Thon project, which is full of a ton of great art ideas for you to use in your home!

by Erica Johns | Jul 28, 2016 | Art
Welcome to one of the projects in our series 8 Awesome Handprint Art Projects to do With Your Kids! To learn more about the project and see a complete list of methods, materials and projects, click here to start at the beginning. (new tab will open for you) Affiliate links have been used.

2. Tree
Supplies you will need:
- Colored paper and paper with patterns if you choose to do the matted look and mount them for impact. (See photos.)
- Glue sticks for mounting
- Small paint brushes: I recommend this brand of brushes. They do not fall apart like cheaper brushes do, they hold up to frequent use and proper cleaning as well.
- Foam flat brushes
- Colored acrylic paints: This is the same set I have in my own home. You get a nice variety of colors at a good price. Plus, the box this set comes in is sturdy, so you can continue to use it for storage.
- Black sharpie or nice thin pens for detailing
You will need washable acrylic paint in either green and brown, or fall colors of red, orange, yellow, and brown.
- Use flat foam brush to paint the entire palm side of hand in either green or fall colors. Press hand down slowly right in the center of the paper, being careful to press all fingers and the palm down well. Slowly pull up.
- Paint the tree trunk in brown. Let dry for a few minutes.
- Once the first paint isn’t too wet, you can paint in branches and accents.
- Once paint is totally dry, you can add more details with pen or marker, as you like.
- Complete your artwork by mounting it onto a background page that peeks out around the edges to form a frame and give it a matted look. Use glue stick on the back of your artwork to affix it to the background page.
All posts in this series:
- Intro to the series
- Red Poppies
- Handprint Trees
- Handprint Fish
- Fingerprint Dandelion
- Handprint Kite
- Handprint Peacock
- Handprint Birds or Chickens
- Hand and fingerprint creative scene
by Erica Johns | Jul 28, 2016 | Art
Welcome to one of the projects in our series 8 Awesome Handprint Art Projects to do With Your Kids! To learn more about the project and see a complete list of methods, materials and projects, click here to start at the beginning. (new tab will open for you) Affiliate links have been used.

3. Fish
Supplies you will need:
- Colored paper and paper with patterns if you choose to do the matted look and mount them for impact. (See photos.)
- Glue sticks for mounting
- Small paint brushes: I recommend this brand of brushes. They do not fall apart like cheaper brushes do, they hold up to frequent use and proper cleaning as well.
- Foam flat brushes
- Colored acrylic paints: This is the same set I have in my own home. You get a nice variety of colors at a good price. Plus, the box this set comes in is sturdy, so you can continue to use it for storage.
- Black sharpie or nice thin pens for detailing
You will need whatever color you choose to make the fish in, pinks, reds, white, and blues are best. Underwater colors work best for the paper–greens, blues, gray.
- Start by painting any details like seaweed, shells, or sea creatures in first with paint brushes, leaving space for wherever you want to put your big handprint fish.
- Use foam brush to paint the entire palm side of hand in the fish color of your choice. Press hand down slowly on the paper wherever you want your fish to go, being careful to press all fingers and the palm down well. Slowly pull up. Let the paint dry.
- After all the paint is dry you can come back with markers or pens to add details.
- Complete your artwork by mounting it onto a background page that peeks out around the edges to form a frame and give it a matted look. Use glue stick on the back of your artwork to affix it to the background page.
All posts in this series:
- Intro to the series
- Red Poppies
- Handprint Trees
- Handprint Fish
- Fingerprint Dandelion
- Handprint Kite
- Handprint Peacock
- Handprint Birds or Chickens
- Hand and fingerprint creative scene
by Erica Johns | Jul 28, 2016 | Art
Welcome to one of the projects in our series 8 Awesome Handprint Art Projects to do With Your Kids! To learn more about the project and see a complete list of methods, materials and projects, click here to start at the beginning. (new tab will open for you) Affiliate links have been used.

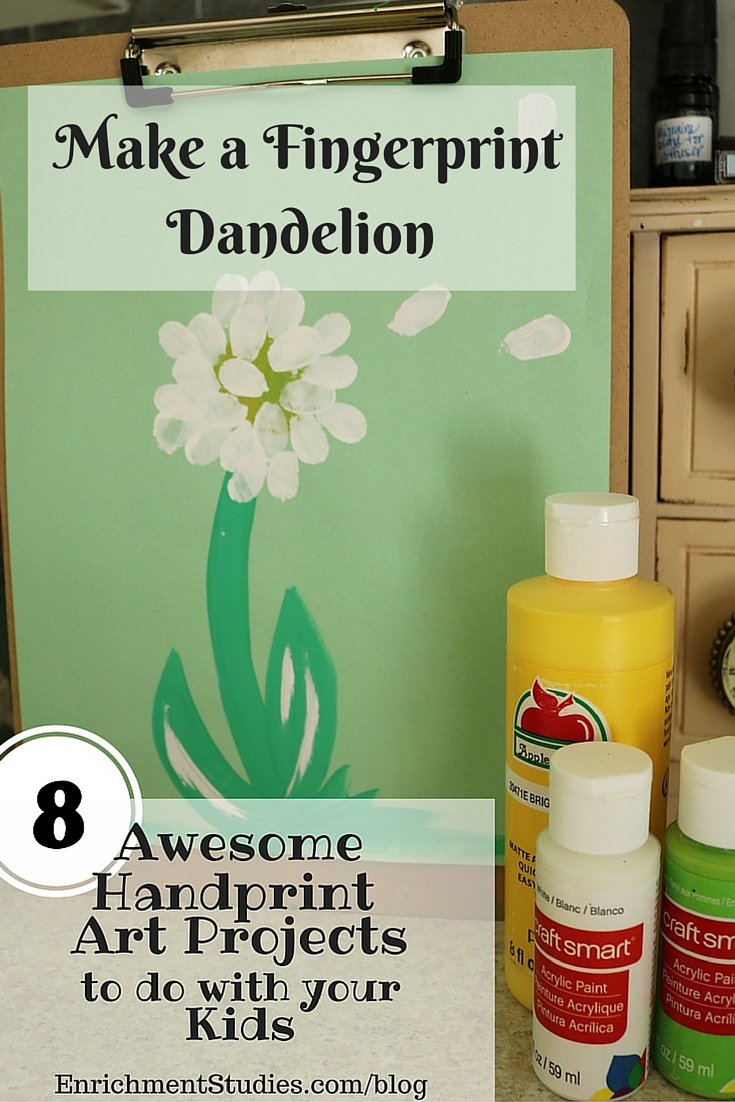
4. Dandelion
Supplies you will need:
- Colored paper and paper with patterns if you choose to do the matted look and mount them for impact. (See photos.)
- Glue sticks for mounting
- Small paint brushes: I recommend this brand of brushes. They do not fall apart like cheaper brushes do, they hold up to frequent use and proper cleaning as well.
- Foam flat brushes
- Colored acrylic paints: This is the same set I have in my own home. You get a nice variety of colors at a good price. Plus, the box this set comes in is sturdy, so you can continue to use it for storage.
- Black sharpie or nice thin pens for detailing
You will need yellow, white, and green paint.
- First, paint stems, leaves, and grass. Then paint a yellow circle at the top of the stems. Let dry for a bit.
- Once the first paint is not too wet, it’s time for the petals. You’ll want to use a smaller finger, like a pinky to make them. Using a foam brush, paint the pad of the finger white. Turn the paper around to make it easy for you to get the right angle for the petals. Reapply paint to finger as needed. Finish by making a few petals flying away as if the wind is blowing them.
- After paint is totally dry, you can add details with pen or marker if desired.
- Complete your artwork by mounting it onto a background page that peeks out around the edges to form a frame and give it a matted look. Use glue stick on the back of your artwork to affix it to the background page.
All posts in this series:
- Intro to the series
- Red Poppies
- Handprint Trees
- Handprint Fish
- Fingerprint Dandelion
- Handprint Kite
- Handprint Peacock
- Handprint Birds or Chickens
- Hand and fingerprint creative scene
by Erica Johns | Jul 28, 2016 | Art
Welcome to one of the projects in our series 8 Awesome Handprint Art Projects to do With Your Kids! To learn more about the project and see a complete list of methods, materials and projects, click here to start at the beginning. (new tab will open for you) Affiliate links have been used.

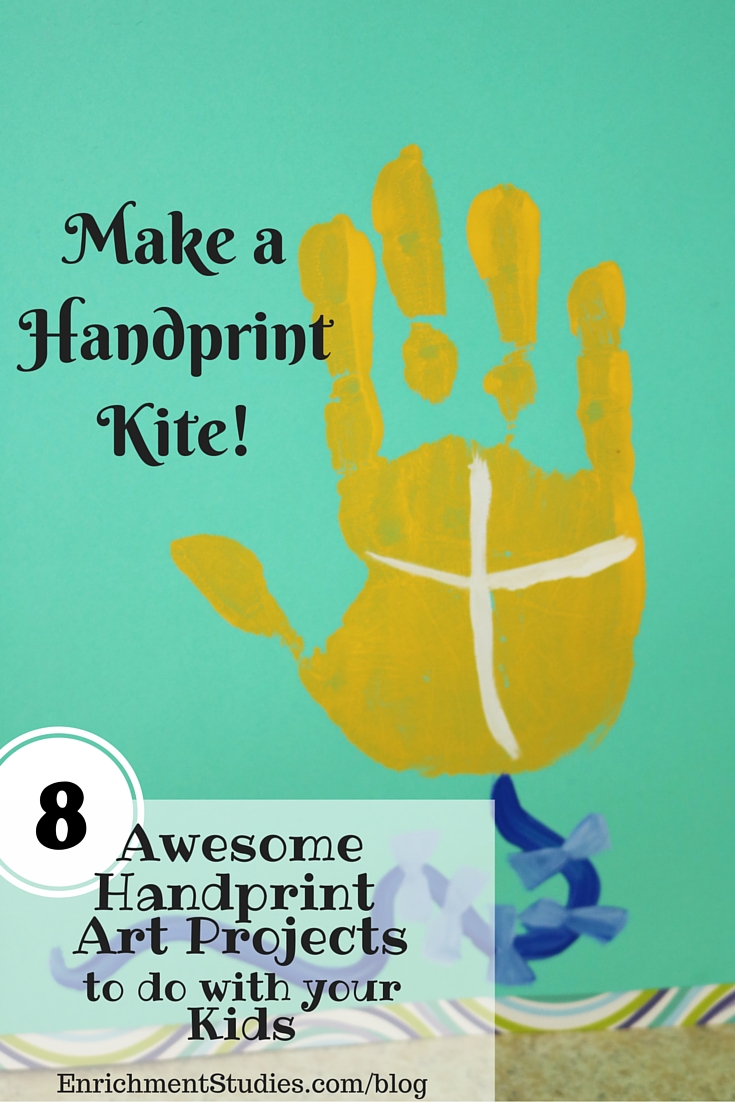
5. Kite
Supplies you will need:
- Colored paper and paper with patterns if you choose to do the matted look and mount them for impact. (See photos.)
- Glue sticks for mounting
- Small paint brushes: I recommend this brand of brushes. They do not fall apart like cheaper brushes do, they hold up to frequent use and proper cleaning as well.
- Foam flat brushes
- Colored acrylic paints: This is the same set I have in my own home. You get a nice variety of colors at a good price. Plus, the box this set comes in is sturdy, so you can continue to use it for storage.
- Black sharpie or nice thin pens for detailing
You will need a dark color for the kite string and a bright color for the kite itself, and then a contrast color for the bows on the string and white for the kite base pieces.
- First, paint the hand (whatever color you want for the kite) with the flat foam brush. Press down well, making sure whole hand is touching paper, then pull up slowly by rolling the hand off to the side, not straight up.
- After it dries a little, paint in the white cross on the kite base and then use a dark color for the string and do the bows.
- After all paint is dried, you can use pens or markers to add in other details, if desired.
- Complete your artwork by mounting it onto a background page that peeks out around the edges to form a frame and give it a matted look. Use glue stick on the back of your artwork to affix it to the background page.
All posts in this series:
- Intro to the series
- Red Poppies
- Handprint Trees
- Handprint Fish
- Fingerprint Dandelion
- Handprint Kite
- Handprint Peacock
- Handprint Birds or Chickens
- Hand and fingerprint creative scene


